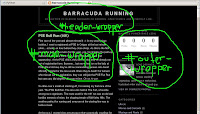
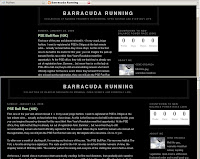
First a bit of background. You know how blog pages seem to be divided into 3 column? The middle column being your blog/widgets/bling-bling and the two other column besides it that are just gaping wasted empty space? Yeah, well, it's been bothering me of late. It makes my post look longer and imposing than it actually is. So I thought I'd dig in and click my way through into changing the layout of my blog. Surprise! surprise! Turns out the changing blog layout is a lot more complicated than it looks. And it ain't pretty boys and girls.
So if you're using Blogspot and wanted to change it, here's how you would do it. As soon as you log in to your account.
- Click on the 'Customize' link on the upper-right corner of your blog.
- There are 3 tabs there (Posting, Settings and Layout).
- Click the Layout tab. Under the Layout tab, there 4 sub-tabs there (Page Elements, Fonts and Colors, Edit HTML, and Pick New Template).
- Click "Edit HTML" tab, and you should now see the "Edit Template" and right below is the code for your blog web page.
Now CSS file might be beloved among web developers and can pass off as your regular, ordinary config file but it's not. It's a bane for normal people trying to take ownership of web pages freely hosted somewhere in the wholly wild world of Internet (hehe, define irony). It's cryptic, indecipherable and perilous to go near them. Fortunately, we only need to change a couple of the settings and not create one from scratch. So here's the basic format to keep in mind when changing the settings:
Selector { Properties: Values; }
The Selector is an identifier to certain part of your web page. The Properties are a way to control those certain part of your web page. The Values is of course the actual settings you change.
Below are the basic settings you need to change. The highlighted text is the modification you need to make. Your mileage might vary of course but so does our aesthetic taste :-) so play around till you get the right layout for you.

#header-wrapper {
width: 990px;
margin:0 auto 10px;
border:1px solid $bordercolor;
}
#outer-wrapper {
width: 1000px;
margin:0 auto;
padding:10px;
text-align:$startSide;
font: $bodyfont;
}
#main-wrapper {
width: 700px;
float: $startSide;
word-wrap: break-word;
overflow: hidden;
}
Change, save, refresh and voilà! Your newly customize layout, just the way you wanted it.
And now here's before and after pic. Happy Hacking mga kapatid!


